项目源码:https://github.com/Baokker/covid_manage_db_system
IDE IDE采用的还是VS Code,不论是本地开发还是用code server处理放在服务器上的代码,用起来都比较顺手。比较好用的一些tips:
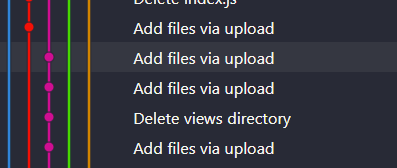
左侧的源代码管理,可以方便地查看代码作出的更改,以及合并时需要手动解决的冲突
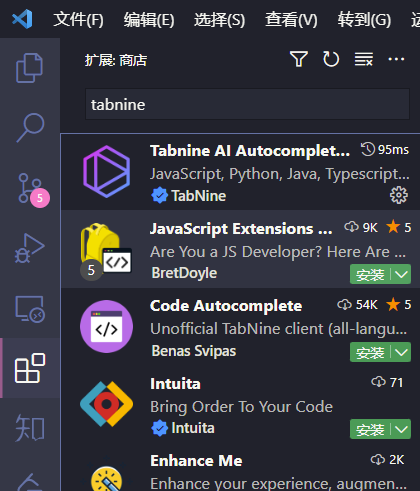
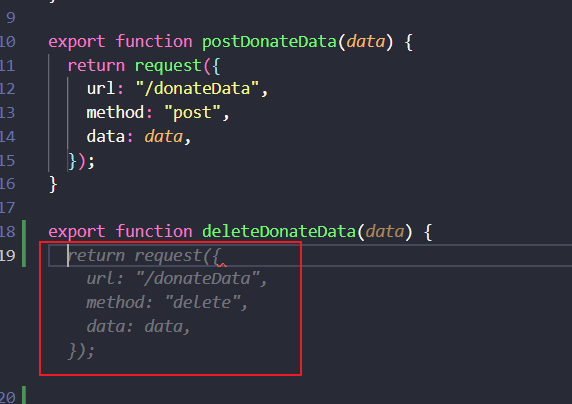
Tabnine人工智能补全代码。仅仅是单行tab补全的free功能,也为我减少了不少工作量(缺点:只能本地弄,服务器吃不消这么大内存~)
彩虹括号配对,当代码没对齐时,可以较快定位到错误位置:ctrl+,打开设置,搜索editor.bracketPairColorization.enabled并设为true
auto close tag插件
Babel JavaScript插件
Vetur(vue官方为vscode提供的插件,对我来说最大的作用在于格式化代码)(同样的功能,再推荐一个Prettier插件,支持语言种类更多)
碎片化 学习前端给我的最大感受是:碎片化
总得来说,我觉得快速把握这些东西,关键在于系统性地学习,去阅读乃至于自己搭建一个框架,了解前后端互动的过程
对我来说,学习路上受益最大的两个学习材料是
git 前端的git我几乎全教了一遍(我是在之前a missing semester里学的git,加上实操后逐渐有所熟练),只能说希望世界上不会再有Add files via upload这样的commit message
直接cv当时写的tips
几个常用的命令
1
2
3
4
5
6
7
8
9
10
11
12
13
14
15
16
17
18
19
20
21
22
23
24
25
26
git add <filename>'commit message' rm <filename>log --all --graph
不要使用
1
2
git push --force
可以用GitHub Desktop(当然,本质仍是命令行)
google 最后几天赶的时候有一段时间梯子挂了,真的特别难受,真的感受到自己已经不能离开Google了
广告少
内容优质,除了Stack Overflow,medium之外,甚至我个人认为搜出来的CSDN也是Google匹配度更高,而且Google出来的思否、掘金文章也更多,怀疑…?
可以纯英文搜索,直接看英文问答和英文文档,不像百度,总得跳出来点中文
只能说,Google在这方面赢百度太多太多了
(bing没怎么用过,不发表评论
vue 2 安装使用看教程
为什么不用vue3
框架的相关教程不如vue2多,有各种适配问题
学长说vue2简单
可以参考的大多框架用vue2写的
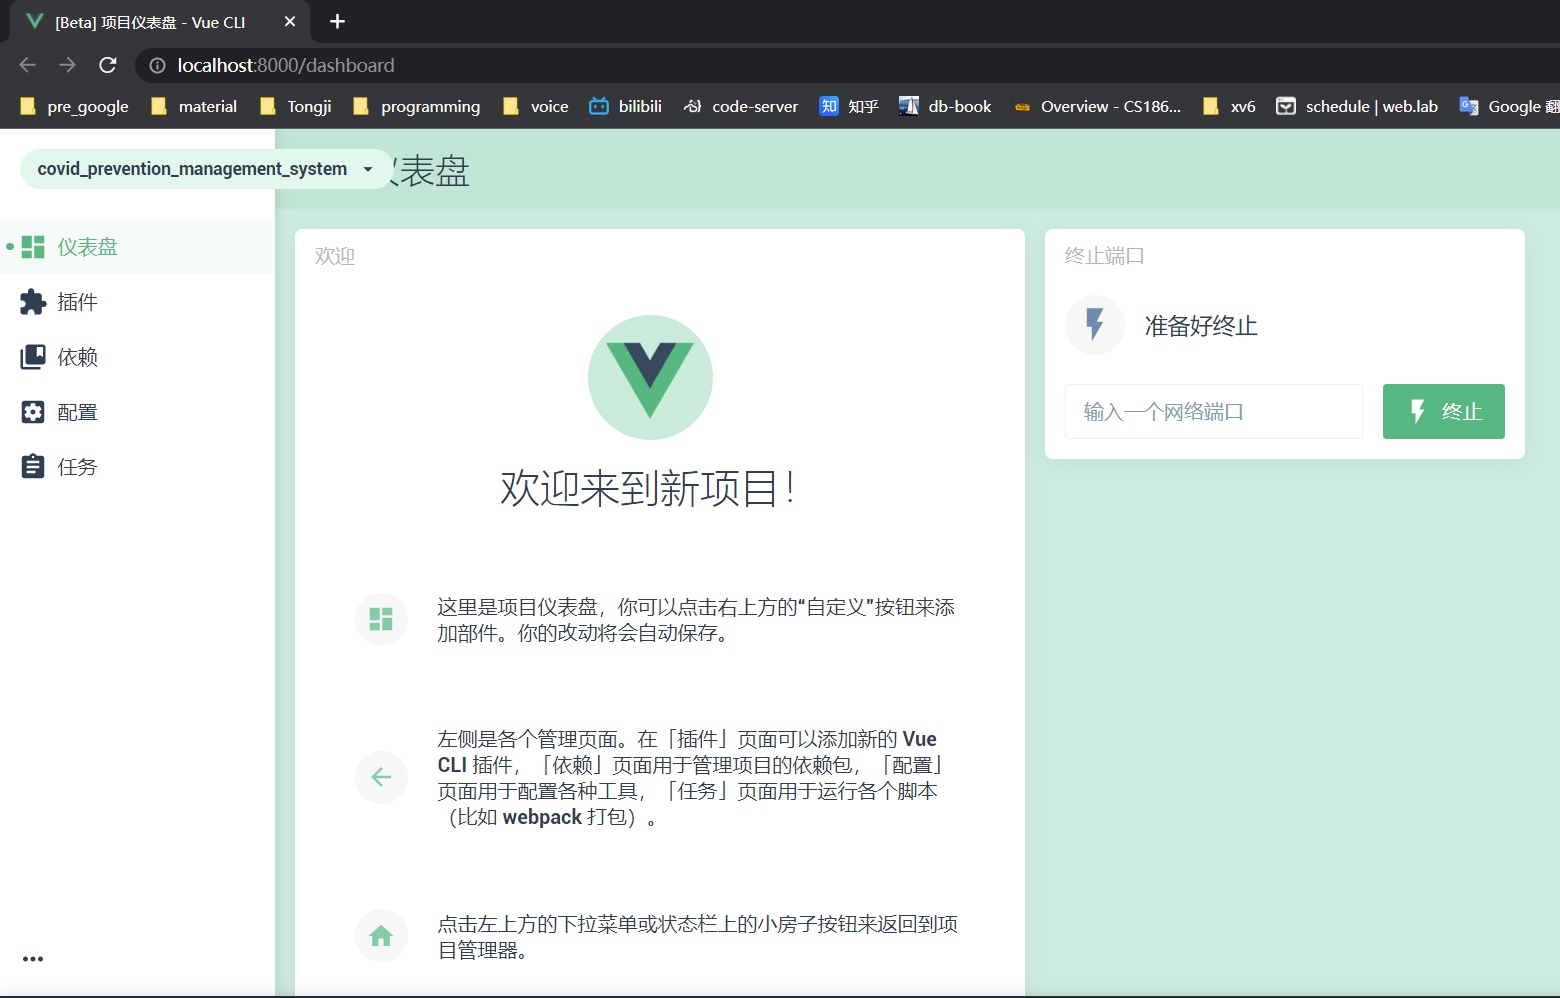
另外提一嘴,嫌vue-cli命令行麻烦的,其实可以在命令行中输入
打开ui界面部署
element ui 本来想试试Vuetify这种material design的主题的,奈何…element ui实在太多了()
顺带评价一句,vue3的element plus 文档感觉不如vue2的element ui 文档详细完备易懂
element ui的上手方法其实很简单:读文档,看他们的示例代码,ctrl c,ctrl v
我们组的两位美化大师也非常给力,在美化过程中引入了el-card,el-drawer,el-carousel(走马灯),v-loading,el-tag,el-pagination,el-input-number,el-select等一系列组件,可谓是物尽其用
router vue-router即路由,指定对应的地址(如/Index)对应的组件(SystemIndex.vue),写法上其实很简单
1
2
3
4
5
6
7
8
9
10
11
12
13
14
15
16
17
18
19
20
21
22
23
24
25
26
27
28
29
30
31
32
33
34
35
36
37
38
39
40
41
42
43
44
45
46
47
48
49
50
51
52
53
54
55
56
57
58
59
60
61
62
63
64
65
66
67
68
import Vue from "vue" ;import Router from "vue-router" ;import NProgress from "nprogress" ; import "nprogress/nprogress.css" ; NProgress .configure ({ showSpinner : false }); export const constantRoutes = [path : "/" ,name : "登录" ,component : () => import ("../views/SystemLogin.vue" ),path : "/Register" ,name : "注册" ,component : () => import ("../views/SystemRegister.vue" ),path : "/404" ,name : "404" ,component : () => import ("../views/404.vue" ),hidden : true ,export const asyncRoutes = [path : "/Index" , name : "主页" ,redirect : "/AboutUs" ,meta : { icon : "Home" , roles : ["admin" , "user" ] },component : () => import ("../views/SystemIndex.vue" ),children : [path : "/CovidBrowse" ,name : "疫情速览" ,component : () => import ("../views/CovidBrowse.vue" ),meta : { roles : ["admin" , "user" ] },path : "*" ,redirect : "/404" ,hidden : true ,const createRouter = (new Router ({mode : "history" , scrollBehavior : () => ({ y : 0 }),routes : constantRoutes,const router = createRouter ();
几个技术点
分为了constantRoutes和asyncRoutes,是因为后续还增加了权限验证,判断哪些页面可以访问哪些页面不可访问,这些都需要动态生成
router默认的模式是hash模式,该方法的缺点是地址栏都是形如/#/Index,前面带个#号,因此用mode: "history"修改为history模式(当然,这都是相对的,用hash模式部署开发的时候会比history方便)
最后这段
1 2 3 4 5 {path : "*" ,redirect : "/404" ,hidden : true ,
是通配符,意味着如果有网址在之前所有的路由里都没匹配,就将其重定向到404页面
除此之外,路由还可以设置拦截,在每个页面跳转间执行操作。to即为前往的路由,from即为出发的路由,就像英语中from…to…一样
NProgress是一个加载进度条的插件
1 2 3 4 5 6 7 8 9 10 11 12 13 14 15 beforeEach ((to, from , next ) => {NProgress .start ();document .title = `${to.name} - 疫情防控系统` ;afterEach (() => {NProgress .done ();
axios axios听起来难,但写起来其实也很方便,它对http请求做了一个很好的封装
首先我们要理解,http请求简单来说,就是对一个url做一些操作,一般有get(获取),post(增加),put(修改),delete(删除)等。
首先在plugins/axios.js中配置axios
1
2
3
4
5
6
7
8
9
10
11
12
13
14
15
16
17
18
19
20
21
22
23
24
25
26
27
28
29
30
31
32
33
34
35
36
37
38
39
40
41
42
43
44
45
46
47
48
49
50
51
52
53
54
55
56
57
58
59
60
61
62
63
64
65
66
67
68
69
70
71
import axios from "axios" ;import store from "@/store" ;import { getToken } from "@/utils/auth" ;import { Message ,MessageBox } from "element-ui" ;const service = axios.create ({baseURL : process.env .VUE_APP_BASE_URL ,timeout : 5000 ,interceptors .request .use ((config ) => {if (store.getters .token ) {headers ["Token" ] = getToken ();console .log (config);return config;(error ) => {console .log (error); return Promise .reject (error);interceptors .response .use ((response ) => {const res = response.data ;console .log (res);if (res.code !== 20000 && res.code !==200 ) {Message ({message : res.message || "Error" ,type : "error" ,if (res.code === 50008 || res.code === 50012 || res.code === 50014 ) {MessageBox .confirm ("您已登出,您可以取消留在此页面,或重新登入" ,"确认登出" ,confirmButtonText : "Re-Login" ,cancelButtonText : "Cancel" ,type : "warning" ,then (() => {dispatch ("user/resetToken" ).then (() => {reload ();return Promise .reject (new Error (res.message || "Error" ));else {return res;(error ) => {console .log ("err" + error); Message ({message : error.message ,type : "error" ,return Promise .reject (error);export default service
看起来有些长,其实要点就这几个
再在main.js里引入
1 2 3 import service from "./plugins/axios" ;Vue .prototype $axios = service;
这样在前端即可通过
1
2
this .$axios .get ("/api" ,{params :{userID :1 }}).then (..).catch (..)this .$axios .post ("/api" ,{userID :1 }).then (..).catch (..)
的方式发送请求
注意一下,get请求如果带参数,都必须放入params字段中 ,然后axios会将其转为形如“xxx?userID=1”的url;其他post,delete,put则都是放入data字段中
api 我们参考的COVID 就是用axios请求写到底。一开始我们也是这么做的,但是最后我们还是做了封装,主要还是让后端方便一些,axios的原始写法固然简单,但是零散在各个角落里,找起来太累了
基本就是这种写法
mock mock最主要的作用还是前后端分离。后端还在开发的时候,前端可以先用mock拦截请求,自己定义返回的数据,来测试页面的效果和逻辑。
此项目默认在development环境(即npm run serve)时启用mock,在production(npm run build)时不启用(见main.js)
1 2 3 4 if (process.env .NODE_ENV == "development" ) {require ("../mock/index" );
新建mock/index.js,以下是几个示例。注意axios传过来的data格式默认为JSON,所以必须先解析
传过来的get如果带参数,会变成后面带有问号的形式,正确的处理方法是用正则表达式接收所有匹配的请求,再用特定函数转为所需内容
1
2
3
4
5
6
7
8
9
10
11
12
13
14
15
16
17
18
19
20
21
22
23
24
25
26
27
28
29
30
31
32
33
34
35
36
37
38
39
40
41
42
43
44
45
46
47
48
49
50
51
52
53
54
55
56
57
58
59
60
61
62
63
64
65
66
67
68
69
70
71
72
73
74
75
76
77
78
79
80
81
82
83
84
85
86
87
88
89
90
91
92
93
94
95
96
97
98
99
100
101
102
103
104
105
const Mock = require ("mockjs" );const baseURL = process.env .VUE_APP_BASE_URL ;Mock .setup ({timeout : 20 ,Mock .mock (baseURL + "/manage" , "get" , {code : 20000 ,data : {manageRecord : [unitId : "11" ,unitName : "haha" ,personId : "22" ,personName : "huhu" ,unitId : "33" ,unitName : "haha" ,personId : "22" ,personName : "huhu" ,Mock .mock (baseURL + "/user/login" , "post" , (config ) => {body = JSON .parse (config.body );if (body .userName != "admin" && config.body .userName != "user" ) ||body .passWord != "12345678" console .log ("Account and password are incorrect." );return {code : 60204 ,message : "账号或密码错误!" ,else {console .log ("login successfully" );return {code : 20000 ,token : config.body .userName + "-token" ,function param2Obj (url ) {const search = decodeURIComponent (url.split ("?" )[1 ]).replace (/\+/g , " " );if (!search) {return {};const obj = {};const searchArr = search.split ("&" );forEach ((v ) => {const index = v.indexOf ("=" );if (index !== -1 ) {const name = v.substring (0 , index);const val = v.substring (index + 1 , v.length );return obj;Mock .mock (RegExp (baseURL + "/user/info.*" ), "get" , (config ) => {console .log ("User info" , config.url );if (param2Obj (config.url ).token .includes ("admin" )) {return {code : 20000 ,data : {roles : ["admin" ],ID : "2051563" ,name : "admin" ,gender : 1 ,phoneNumber : "" ,age : 0 ,else {return {code : 20000 ,data : {roles : ["user" ],ID : "456" ,name : "user" ,gender : 0 ,phoneNumber : "12345678" ,age : 20 ,
mock还有Random模块很重要,不过这次项目并没有用到,以后再说。
vuex https://www.51cto.com/article/686468.html
和vuex的官方文档可以看看,这里面东西挺多,我只学了我们需要的部分
首先,vuex相当于一个存储器,将多个组件都会用到的变量都集中存在vuex中
Index.js(多module方法)
1
2
3
4
5
6
7
8
9
10
11
12
13
14
15
16
17
import Vue from "vue" ;import Vuex from "vuex" ;import user from "./modules/user" ;import permission from "./modules/permission" ;import getters from "./getters" ;Vue .use (Vuex )const store = new Vuex .Store ({modules : {export default store
getters.js(很像vue的computed,不是吗),定义后可在全局用类似this.$store.getters.token的方法获取数据
1
2
3
4
5
6
7
8
9
10
11
const getters = {token : (state ) => state.user .token ,ID :(state ) => state.user .ID ,name : (state ) => state.user .name ,roles : (state ) => state.user .roles ,phoneNumber : (state ) => state.user .phoneNumber ,age : (state ) => state.user .age ,gender : (state ) => (state.user .gender == "1 " ? "男" : "女" ),permission_routes : (state ) => state.permission .routes ,export default getters;
重点讲讲user.js
1
2
3
4
5
6
7
8
9
10
11
12
13
14
15
16
17
18
19
20
21
22
23
24
25
26
27
28
29
30
31
32
33
34
35
36
37
38
39
40
41
42
43
44
45
46
47
48
49
50
51
52
53
54
55
56
57
58
59
60
61
62
63
64
65
66
67
68
69
70
71
72
73
74
75
76
77
78
79
80
81
82
83
84
85
86
87
88
89
90
91
92
93
94
95
96
97
98
99
100
101
102
103
104
105
106
107
108
109
110
111
112
113
114
115
116
117
118
119
120
121
122
123
124
125
126
127
128
129
130
131
132
133
134
135
136
137
138
139
140
141
142
143
144
145
146
import { getToken, setToken, removeToken } from "@/utils/auth" ;import { resetRouter } from "@/router" ;import { login, getInfo } from "@/api/user.js" ;const getDefaultState = (return {token : getToken (),ID : "" ,name : "" ,roles : [],gender : 1 , phoneNumber : "" ,age : 0 ,const state = {token : getToken (),ID : "" ,name : "" ,roles : [],gender : 1 , phoneNumber : "" ,age : 0 ,const mutations = {RESET_STATE : (state ) => {Object .assign (state, getDefaultState ());SET_TOKEN : (state, token ) => {token = token;SET_ID : (state, ID ) => {ID = ID ;SET_NAME : (state, name ) => {name = name;SET_ROLES : (state, roles ) => {roles = roles;SET_GENDER : (state, gender ) => {gender = gender;SET_AGE : (state, age ) => {age = age;SET_PHONE_NUMBER : (state, phoneNumber ) => {phoneNumber = phoneNumber;const actions = {login ({ commit }, userInfo ) {const { userName, passWord } = userInfo;return new Promise ((resolve, reject ) => {login ({ userName : userName.trim (), passWord : passWord })then ((res ) => {const { token } = res;commit ("SET_TOKEN" , token);setToken (token);resolve ();catch ((error ) => {reject (error);getInfo ({ commit } ) {return new Promise ((resolve, reject ) => {getInfo (state.token )then ((res ) => {const { data } = res;if (!data) {reject ("Verification failed, please Login again." );const { roles, ID , name, gender, phoneNumber, age } = data;if (!roles || roles.length <= 0 ) {reject ("getInfo: roles must be a non-null array!" );commit ("SET_ROLES" , roles);commit ("SET_ID" , ID );commit ("SET_NAME" , name);commit ("SET_GENDER" , gender);commit ("SET_PHONE_NUMBER" , phoneNumber);commit ("SET_AGE" , age);resolve (data);catch ((error ) => {reject (error);logout ({ commit } ) {return new Promise ((resolve, reject ) => {removeToken (); resetRouter ();commit ("RESET_STATE" );resolve ();resetToken ({ commit } ) {return new Promise ((resolve ) => {removeToken (); commit ("RESET_STATE" );resolve ();export default {namespaced : true ,
state 存放 vuex 的基本数据,用来存储变量
mutations 用来更改state,通过commit调用(这是同步的)
actions 是异步的,用于替代mutations的同步操作(前端开发经常会为了保证响应速度,用到异步操作),通过dispatch调用,例如
1
2
3
4
5
6
7
8
9
this .$store dispatch ("user/login" , this .loginForm )then (() => {this .$router .push ({ path : this .redirect || "/Index" },()=> {});this .loading = false ;catch (() => {this .loading = false ;
最后在main.js引入
1 2 import store from "./store" ;
vuex的一个重要特点是刷新后会消失 ,对此我们的处理方法是,在每次路由拦截时尝试获取该用户的roles,如果vuex中没有存储(表示第一次登录或者已经刷新了),则调用getInfo的api,重新用vuex存储。(token用js-cookie存储,因此可以持久存储)
验证码 全是参考这篇的
https://juejin.cn/post/7029343961168740366
网页拦截,动态路由 这是全篇最难的地方,要点有
如果用户没有登录,只能强制返回登录页
如果登陆了(提一嘴,本项目mock里,用户名只有user,admin,密码只有12345678)
需要根据用户的权限,动态生成路由列表
访问不该访问的列表时,返回404
直接贴吧
首先是配置router的meta属性,加上roles
1 2 3 4 5 6 7 8 9 10 11 12 13 14 15 16 17 18 19 20 21 22 23 24 25 26 27 28 29 30 31 32 33 34 35 36 37 38 39 40 41 42 43 44 45 46 47 export const asyncRoutes = [path : "/Index" , name : "主页" ,redirect : "/AboutUs" ,meta : { icon : "Home" , roles : ["admin" , "user" ] },component : () => import ("../views/SystemIndex.vue" ),children : [path : "/CovidBrowse" ,name : "疫情速览" ,component : () => import ("../views/CovidBrowse.vue" ),meta : { roles : ["admin" , "user" ] },path : "/CovidProtection" ,name : "防控指南" ,component : () => import ("../views/CovidProtection.vue" ),meta : { roles : ["admin" , "user" ] },path : "/AboutUs" ,name : "网站简介" ,component : () => import ("../views/Home.vue" ),meta : { roles : ["admin" , "user" ] },path : "/PersonManage" ,redirect : "/Index" ,name : "防控单位管理" ,component : () => import ("../views/SystemIndex.vue" ),meta : { icon : "Unit" , roles : ["admin" ] },children : [path : "/addManageRecord" ,name : "添加管理信息" ,component : () => import ("../views/AddManageRecord.vue" ),meta : { roles : ["admin" ] },
在store/permission.js里编写动态生产路由的action
1
2
3
4
5
6
7
8
9
10
11
12
13
14
15
16
17
18
19
20
21
22
23
24
25
26
27
28
29
30
31
32
33
34
35
36
37
38
39
40
41
42
43
44
45
46
47
48
49
50
51
52
53
54
55
56
57
58
59
60
61
62
63
64
65
66
67
68
69
70
import { asyncRoutes, constantRoutes } from '@/router' function hasPermission (roles, route ) {if (route.meta && route.meta .roles ) {return roles.some (role =>meta .roles .includes (role))else {return true export function filterAsyncRoutes (routes, roles ) {const res = []forEach (route =>const tmp = { ...route }if (hasPermission (roles, tmp)) {if (tmp.children ) {children = filterAsyncRoutes (tmp.children , roles)push (tmp)return resconst state = {routes : [],addRoutes : []const mutations = {SET_ROUTES : (state, routes ) => {addRoutes = routesroutes = constantRoutes.concat (routes)const actions = {generateRoutes ({ commit }, roles ) {return new Promise (resolve =>let accessedRoutesif (roles.includes ('admin' )) {else {filterAsyncRoutes (asyncRoutes, roles)commit ('SET_ROUTES' , accessedRoutes)resolve (accessedRoutes)export default {namespaced : true ,
最后来到beforeEach的完整代码
1 2 3 4 5 6 7 8 9 10 11 12 13 14 15 16 17 18 19 20 21 22 23 24 25 26 27 28 29 30 31 32 33 34 35 36 37 38 39 40 41 42 43 44 45 46 47 48 49 50 51 52 53 54 55 56 57 58 59 60 61 62 63 64 65 66 67 68 69 router.beforeEach (async (to, from , next) => {NProgress .start ();document .title = `${to.name} - 疫情防控系统` ;const hasToken = getToken ();if (hasToken) {if (to.path == "/" ) {next ("/Index" );NProgress .done ();else {const hasRoles = store.getters .roles && store.getters .roles .length > 0 ;if (hasRoles) {next ();else {try {const { roles } = await store.dispatch ("user/getInfo" );const accessRoutes = await store.dispatch ("permission/generateRoutes" ,forEach ((singleRoute ) => {addRoute (singleRoute);options .routes = store.getters .permission_routes ;next ({ ...to, replace : true });catch (error) {await store.dispatch ("user/resetToken" );Message .error (error || "Has Error" );next (`/?redirect=${to.path} ` );NProgress .done ();else {if (whiteList.indexOf (to.path ) !== -1 ) {next ();else {Message ({message : "请先登录!" ,type : "warning" ,next (`/?redirect=${to.path} ` );NProgress .done ();
这里的router.options.routes = store.getters.permission_routes;debug了很久,最后看到,不管是vue-admin还是vue-router的github issues,其实早就提到了这个问题(所以,一定要多用谷歌)
https://github.com/PanJiaChen/vue-element-admin/issues/2370
https://github.com/vuejs/vue-router/issues/1859
https://www.cnblogs.com/rzsyztd/p/14134565.html
我们的Index里用
1
2
3
4
created (this .router = this .$router .options .routes .filter ((i ) => {return i.meta ;
生成router
但这个生成后不会动态更改,因此我们还是先把生成的路由放在vuex里,再赋值给this.$router.options
SvgIcon 网上SvgIcon的封装教程很多,我参考的是这两篇
https://juejin.cn/post/6844903517564436493
https://kalacloud.com/blog/using-svg-and-vue-complete-guide/
(这卡拉云广告多,但是优质教程也很多hh)
vue.config.js
1
2
3
4
5
6
7
8
9
10
11
12
13
14
15
16
17
module .exports = defineConfig ({chainWebpack (config ) {module .rule ("svg" ).exclude .add (resolve ("src/icons" )).end ();module rule ("icons" )test (/\.svg$/ )include .add (resolve ("src/icons" ))end ()use ("svg-sprite-loader" )loader ("svg-sprite-loader" )options ({symbolId : "icon-[name]" ,end ();
components/SvgIcon.vue
1 2 3 4 5 6 7 8 9 10 11 12 13 14 15 16 17 18 19 20 21 22 23 24 25 26 27 <template><svg class ="svg-icon" aria-hidden ="true" > <use :xlink:href ="iconName" /> </svg > <style > .svg-icon { width : 1.5em ; height : 1.5em ; } </style > <script > export default { props : { iconClass : { type : String , required : true , }, }, computed : { iconName ( return `#icon-${this .iconClass} ` ; }, }, }; </script >
icons/index.js
1
2
3
4
5
6
7
8
9
10
11
12
13
14
import Vue from "vue" ;import SvgIcon from "@/components/SvgIcon" ;Vue .component ("svg-icon" , SvgIcon );const svg = require .context ("./svg" , false , /\.svg$/ );const requireAll = (requireContext ) =>keys ().map (requireContext);
main.js
接着可以去iconfont等网站下载svg,放在icons/svg文件夹里即可
在各处都可直接引入
<svg-icon : icon-class ="this.isCollapse ? 'Collapse' : 'Expand'" @click.native.prevent="changeCollapse" />
我们更是在router的meta里加了icon属性,在systemindex里v-for套娃
1 2 3 4 5 6 7 8 9 10 11 12 13 14 15 16 17 18 19 20 21 22 23 24 25 26 27 28 29 30 31 32 33 34 35 36 37 38 39 40 <el-menudefault -active="$route.path" "isCollapse" class ="el-menu-vertical" <el-submenu v-for ="(item, index) in router" :index ="index + ''" :key ="index" > <template slot ="title" > <div align ="left" > <svg-icon v-if ="item.meta && item.meta.icon" :icon-class ="item.meta && item.meta.icon" style ="margin-right: 10px" > </svg-icon > <span style ="font-weight: bold" > {{ item.name }}</span > </div > </template > <el-menu-item-group > <el-menu-item v-for ="(item2, index2) in item.children" :index ="item2.path" :key ="index2" > <template > <svg-icon v-if ="item2.meta && item2.meta.icon" :icon-class ="item2.meta && item2.meta.icon" > </svg-icon > <span style ="font-size: small; float: left" > {{ item2.name }}</span > </template > </el-menu-item > </el-menu-item-group > </el-submenu >
我还是要讲一下遇到最大的一次版本不统一的坑
https://juejin.cn/post/7098899448335450126
一直报错Error: Cannot find module ‘webpack/lib/RuleSet’,查了半天也查不出来
最后发现自己的svg-sprite-loader还是4.3.x版本,安装到5.2.1以上就解决了bug
痛苦,差点nodejs都重装了
导航美化 面包屑 我们的路由默认都是两级,因此不必像vue-admin一样还加一层无线递归创建的逻辑,直接手写解决即可
SystemIndex
1 2 3 4 5 6 7 8 9 10 11 12 13 14 15 16 17 18 19 20 21 22 23 24 25 26 27 28 29 30 31 32 33 34 35 36 37 38 39 40 <el-menudefault -active="$route.path" "isCollapse" class ="el-menu-vertical" <el-submenu v-for ="(item, index) in router" :index ="index + ''" :key ="index" > <template slot ="title" > <div align ="left" > <svg-icon v-if ="item.meta && item.meta.icon" :icon-class ="item.meta && item.meta.icon" style ="margin-right: 10px" > </svg-icon > <span style ="font-weight: bold" > {{ item.name }}</span > </div > </template > <el-menu-item-group > <el-menu-item v-for ="(item2, index2) in item.children" :index ="item2.path" :key ="index2" > <template > <svg-icon v-if ="item2.meta && item2.meta.icon" :icon-class ="item2.meta && item2.meta.icon" > </svg-icon > <span style ="font-size: small; float: left" > {{ item2.name }}</span > </template > </el-menu-item > </el-menu-item-group > </el-submenu >
可折叠 这里用到了子组件向父组件传递信息的方法
首先在父组件SystemIndex中向子组件传递props,也就是changeMenu方法(改变导航栏的伸缩情况
1 <NavBar @changeMenu="changeMenu" ></NavBar >
在子组件NavBar中,在icon里设置点击触发
1 <svg-icon :icon-class ="this.isCollapse ? 'Collapse' : 'Expand'" @click.native .prevent ="changeCollapse" />
触发后,在对应method中向父组件发送(emit)信号,父组件将会执行对应函数
1
2
3
4
5
6
methods : {changeCollapse (this .isCollapse = !this .isCollapse ;this .$emit("changeMenu" );
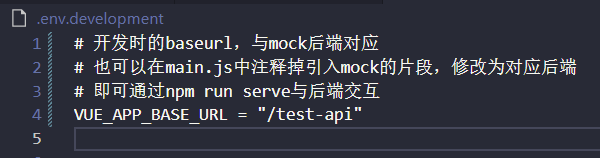
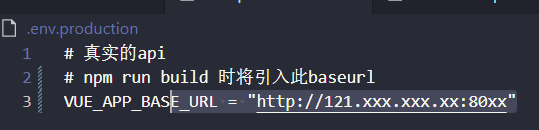
环境配置 在开发的时候,针对不同的处理方式,设置了不同的环境变量,例如run serve时用mock的api,build再用真实的后端
但是要注意,开头一定要带有VUE_APP
请注意,只有 NODE_ENV,BASE_URL 和以 VUE_APP_ 开头的变量将通过 webpack.DefinePlugin 静态地嵌入到客户端侧 的代码中。这是为了避免意外公开机器上可能具有相同名称的私钥。
相关教程:https://cli.vuejs.org/zh/guide/mode-and-env.html
9.10更新:学weblab的时候了解到,这些变量其实是不宜放在开源项目中的,最好还是加入到gitignore中,毕竟我们后来赶ddl,赶着赶着就把后端服务器的ip传上去了~
调试 Vue Devtools,可以去查看一下,会爬梯子就很容易安装
语法检查 之前因为嫌babel的语法检查(它总是建议Component统一用multi word的方式命名,但是404页面真的需要multiword吗?我不懂),因此把它关掉了。后来想想,前端代码繁杂,要求严格一些也并非一些坏事,还可以de掉一些不必要的bug,于是又将其开启
vue.config.js
1
2
3
4
5
module .exports = defineConfig ({transpileDependencies : true ,lintOnSave :true ,
又增加了.eslintrc.js
1
2
3
4
5
6
7
8
9
10
11
12
13
14
15
16
17
18
19
20
21
module .exports = {"root" : true ,"env" : {"node" : true "extends" : ["plugin:vue/essential" ,"eslint:recommended" "parserOptions" : {"parser" : "babel-eslint" rules : {"vue/multi-word-component-names" : ["error" ,ignores : ["404" ,'Verify' ,"News" ,"Header" ,"Home" ],
在rules里加入ignores,就不会再对这个vue文件的命名报错
加上后果然发现了不少问题,de完后感觉代码整洁了不少
部署发布 最主要参考了medium上的这篇 和vue-admin的打包发布教程
我在我的服务器上部署了网站(还崩了两回,可能还是我腾讯云买的配置太差了呜呜)
系统是Ubuntu20.04
首先安装nginx
1 sudo apt-get install nginx
然后假定我的项目名为covid,做如下处理
1
2
3
sudo touch /etc/nginx/sites-available/covid
这里注意,ln一定要用绝对路径,不然会死循环,不要问我为什么知道的
接下来修改这个covid文件
server_name localhost; 可以改成对应的域名
try_files $uri $uri/ /index.html;是针对router是history的mode的情况下写的,因为此模式下nginx无法直接找到对应的页面
1
2
3
4
5
6
7
8
9
10
11
12
13
14
15
server {
接下来,在写好的前端代码文件夹中运行
将生成的dist文件夹复制到服务器的/covid/dist位置(注意是根目录),也就是对应的root位置
接着启动nginx
1
2
sudo nginx -t # 检查语法
一些细节 Promise .then()还有.catch()都是什么?为什么会用到这些东西?这些其实就是Promise的快速写法
https://developer.mozilla.org/zh-CN/docs/Web/JavaScript/Guide/Using_promises
对一个异步函数,分别定义两个回调函数resolve和reject,表示成功运行和抛出异常时的不同操作
css scss transition的动画效果很有意思,可以去学一下
https://segmentfault.com/a/1190000041923259
flex布局比传统的align和float布局方法更高级(也复杂得多),但效果确实好,建议去学学
scss是css的超集,提供了更多的功能